
0
Owner's of the Craftmade Outdoor Ceiling Fan ceiling fan gave it a score of 0 out of 5. Here's how the scores stacked up:

page 8
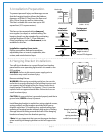
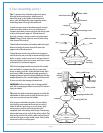
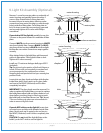
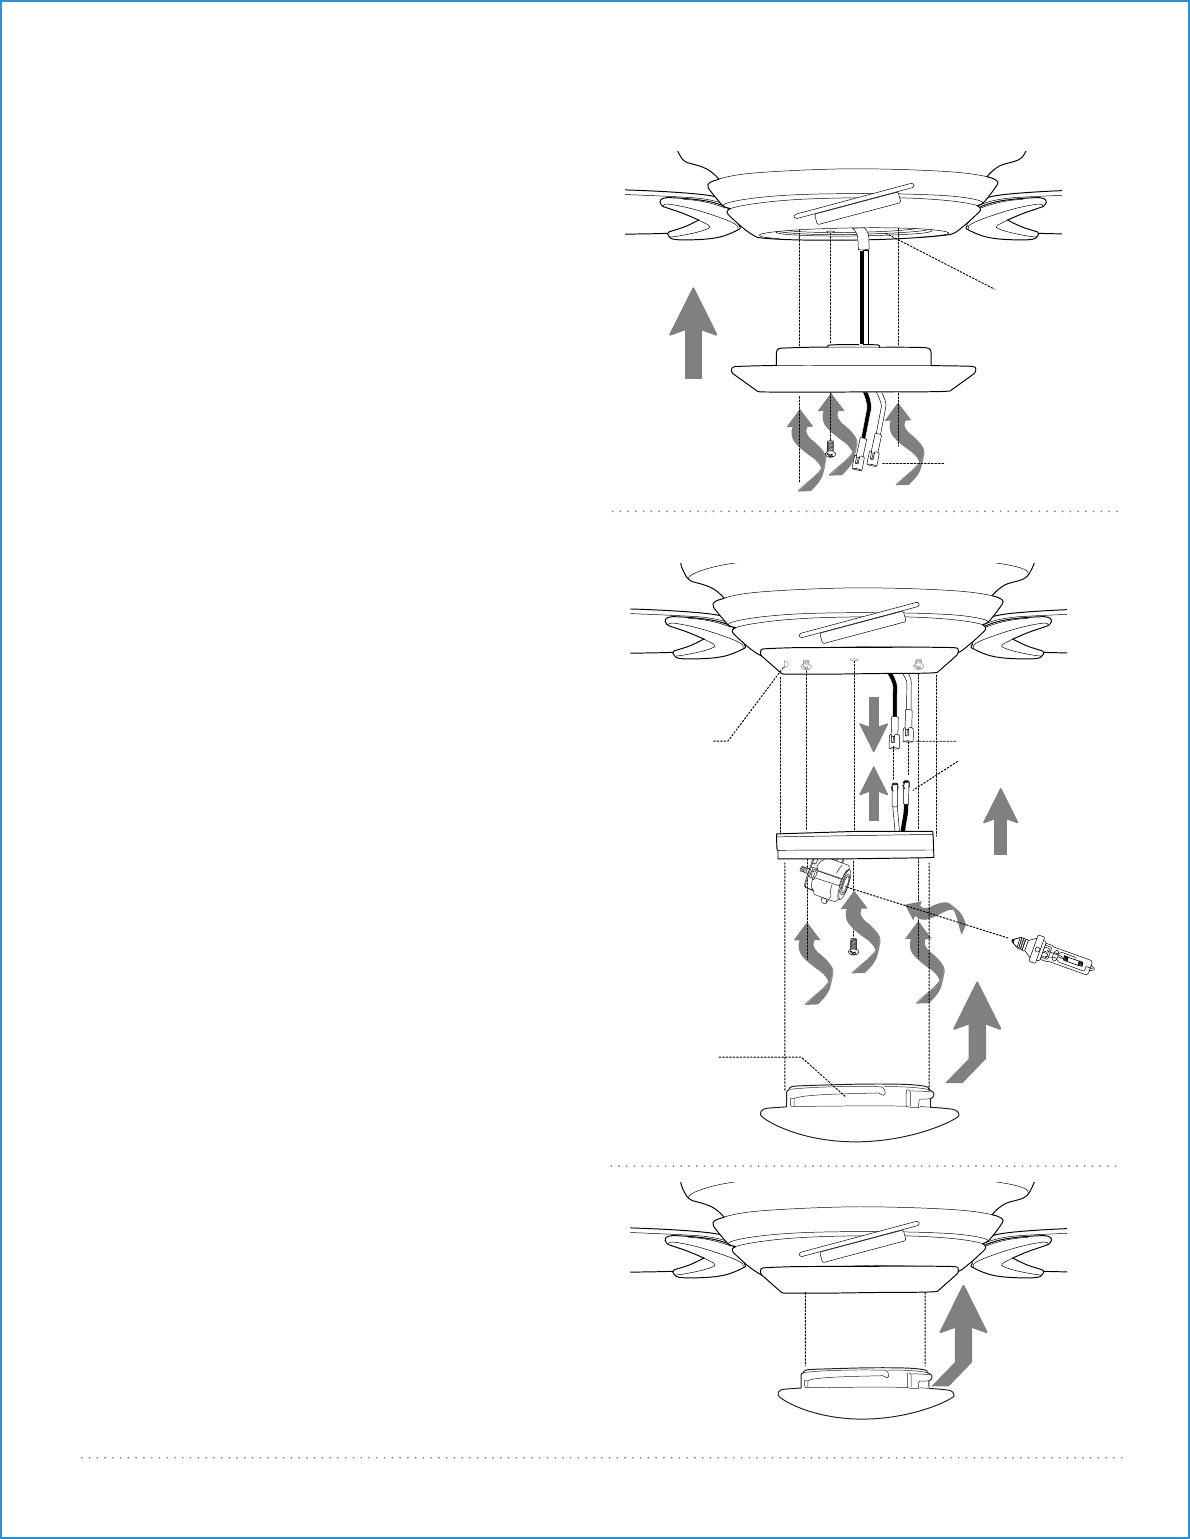
9. Light Kit Assembly (Optional).
light kit fitter
molex
connections
glass shade
slots
dimples
bulb
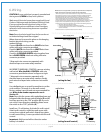
motor housing
fitter plate
molex connections
motor plate
motor housing
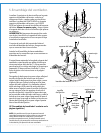
Remove 1 screw from motor plate on underside of
motor housing and partially loosen the other 2
screws. Align slotted holes in fitter plate with
loosened screws in motor plate, allowing molex
connections from motor housing to come through
hole in middle of fitter plate. Twist fitter plate to
lock. Re-insert screw that was previously removed
and securely tighten all 3 screws with Phillips
screwdriver.
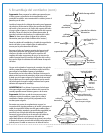
If you wish to USE the light kit, partially loosen the
3 screws on the posts located on underside of fitter
plate.
Connect WHITE wire from motor housing to WHITE
wire from light kit fitter. Connect BLACK (or BLUE)
wire from motor housing to BLACK wire from light
kit fitter. Be sure molex connections snap together
securely.
Align slotted holes in light kit fitter with loosened
screws in fitter plate. Twist light kit fitter to lock.
Tighten all 3 screws securely.
Install one 75 watt max. halogen bulb, type JD E11
(included).
Tip: Do not touch glass portion of bulb with fingers or
hands. Oil from skin can cause bulb to overheat and
go out prematurely. Use cardboard box or foam
wrapping bulb was packed with to layer around glass
portion of bulb.
Locate slots on glass shade and align with dimples
inside fitter plate. Gently push up on glass shade
and turn to the RIGHT (clockwise) until it slides
completely into place.
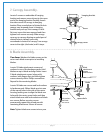
IMPORTANT: The glass shade must be removed* in
order to replace the bulb. When you need to replace
the bulb, please allow bulb and glass shade to cool
down before touching. Keep in mind not to touch
the bulb itself as described above (see "Tip" above)
*The use of rubber grip gloves are recommended in
order to remove the glass shade.
If you do NOT wish to use the light kit, locate slots
on metal cover and align with dimples inside fitter
plate. Gently push up on metal cover and turn to
the RIGHT (clockwise) until it slides completely into
place.
CAUTION: Do not install the light kit fitter or the
bulb if you do NOT wish to use the light kit.
metal cover


Find Your Products By Category
Please Login
