

0
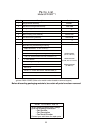
Owner's of the Fanimation Fan gave it a score of 0 out of 5. Here's how the scores stacked up:


6
Figure 6
Figure 7
Figure 3
Figure 5
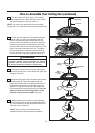
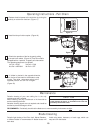
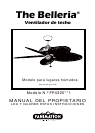
How to Assemble Your Ceiling Fan (continued)
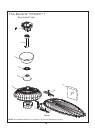
Downrod
Black, Blue and
White Lead
Ceiling
Canopy
Motor
Coupling
Cover
Canopy Screw
Cover
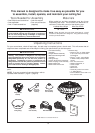
NOTE: You will be using either the 6 downrod supplied
with your fan or an optional downrod purchased separately.
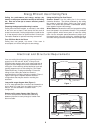
3. The fan comes with blue, black, and white 80”
Separate and untwist the three wires. Route
the wires
wires.
through the downrod. (Figure 3)
4. Loosen the two setscrews in the downrod support.
Align the clevis pin holes in the downrod with the
holes in the downrod support. Install the clevis pin
and secure with the hairpin clip. Be sure to push the
straight leg of the hairpin clip through the hole near
the end of the clevis pin until the curved portion of the
hairpin clip snaps around the clevis pin. The hairpin
clip must be properly installed to prevent the clevis
pin from working loose. Pull on the downrod to make
sure the clevis pin is properly installed. (Figure 4)
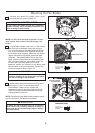
WARNING
It is critical that the clevis pin in the downrod support
is properly installed and the setscrews are securely
tightened. Failure to verify that the pin and setscrews
are properly installed could result in the fan falling.
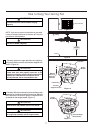
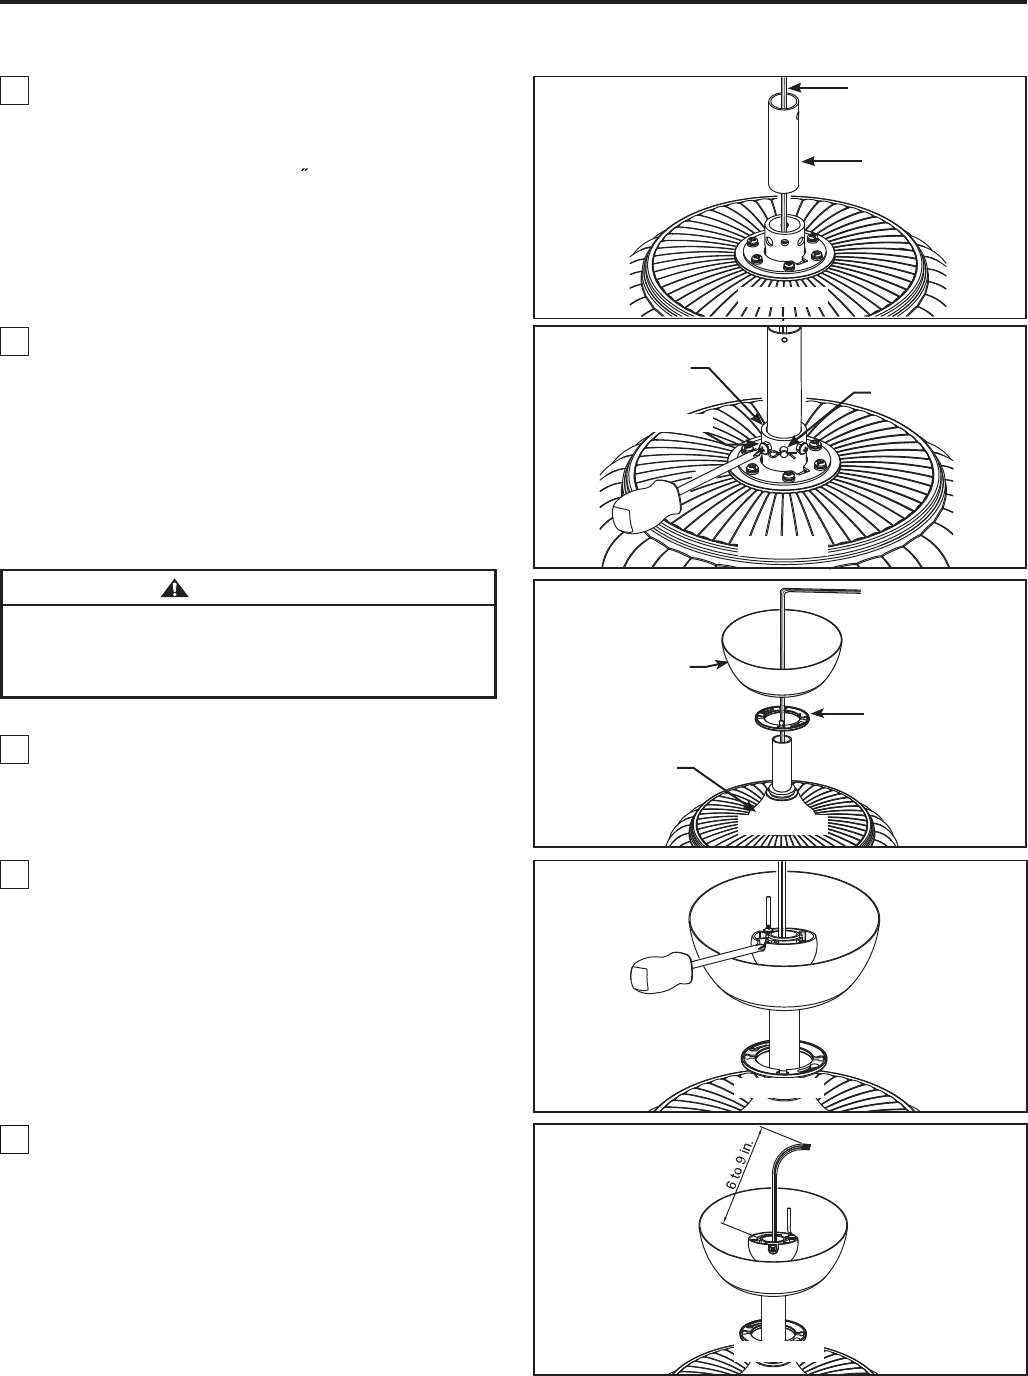
5. yponac,revocgnilpuocrotomhguorhtseriwetuoR
edisnepohtiwnwohsnafnorevocwercsyponachtiw
facing up. (Figure 5)
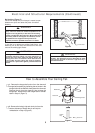
6. Reinstall the hanger ball on the downrod as follows.
Route the three 80” wires and cable through the
hanger ball. Position the pin through the two holes in
the downrod and align the hanger ball so the pin is
captured in the groove in the top of the hanger ball.
Pull the hanger ball up tight against the pin. Securely
tighten the setscrew in the hanger ball. A loose
setscrew could create fan wobble. (Figure 6)
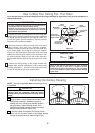
7. Before installing fan, measure up approximately
6-9 inches above top of downrod/hanger ball assem-
bly. Cut off excess wire and strip back insulation 1/2”
from end of wire. (Figure 7)
NOTE: All set screws must be checked and
retightened where necessary before installation.
Hairpin Clip
Figure 4
Downrod
Support
Setscrew (2)


Find Your Products By Category
Please Login
