

0
Owner's of the Sea Gull Lighting Fan Sea Gull Lighting Ceiling Fan gave it a score of 0 out of 5. Here's how the scores stacked up:
1590-CUL-ENG
HC-807
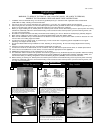
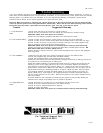
Carefully lift fan assembly onto mounting
bracket. Rotate fan so that the notch on the
ball engages the ridge in the mounting bracket.
This will allow hands-free wiring.
7
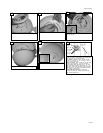
Attach blade brackets and floating brackets
onto blades.
12
Make wire connections to power source using
wire nuts provided. Make sure that no filiments
are outside of the wirenut. After making the
wire connections, the wires should be spread
apart with the grounded conductor and the
equipment-grounding conductor on one side of
the outlet box and ungrounded conductor on
the other side of the outlet box.
11
Raise the canopy up and align the two holes in
the canopy with the two holes in the hanger
bracket. Secure with two screws provided.
15
Attach blade bracket and floating bracket to
blade using screws and washers provided.
Tighen screws securely. Repeat this process 4
more times until all blades are assembled.
13
floating brackets
blade brackets
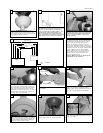
Install remote receiver by sliding into opening in
the Mounting bracket. Make sure that the dip
switches on the Transmitter and the Receiver
are set to the same position. See Fig for
remote operation
9
Check the motor for shipping stabilizers and
remove them if they are present. The screws,
washers and motor pads are pre-installed to
the blade holders. Attach blade assembly to
motor and tighten screws securely.
14
Remove 2 screws as shown. Then install brack-
et for glass fixture using the screws removed
earlier. (see insert)
16
Remote receiver
Motor
10
Fan
White
Black
White
Black (to motor)
Blue (to Light)
Gray
Purple
White (to motor)
Black
Blue
Gray
Purple
Make wire connections as per diagram in fig.
10. Connect the white wire from the Receiver
to the White or Neutral wire from the power
source. Connect the black wire from the
Receiver to the Black or hot wire from the
power source. Connect all Green / Yellow wires
from the fan, Downrod and mounting bracket to
the Ground wire from the house. Connect White
(motor) to White from fan, Connect Black
(motor) to Black from fan, Connect Blue (to
light) to Blue from fan, Connect Gray from
remote to gray from fan and Purple from
remote to Purple from fan.
Warning: Make sure that all filiments are
inside the wire nut connector.
House
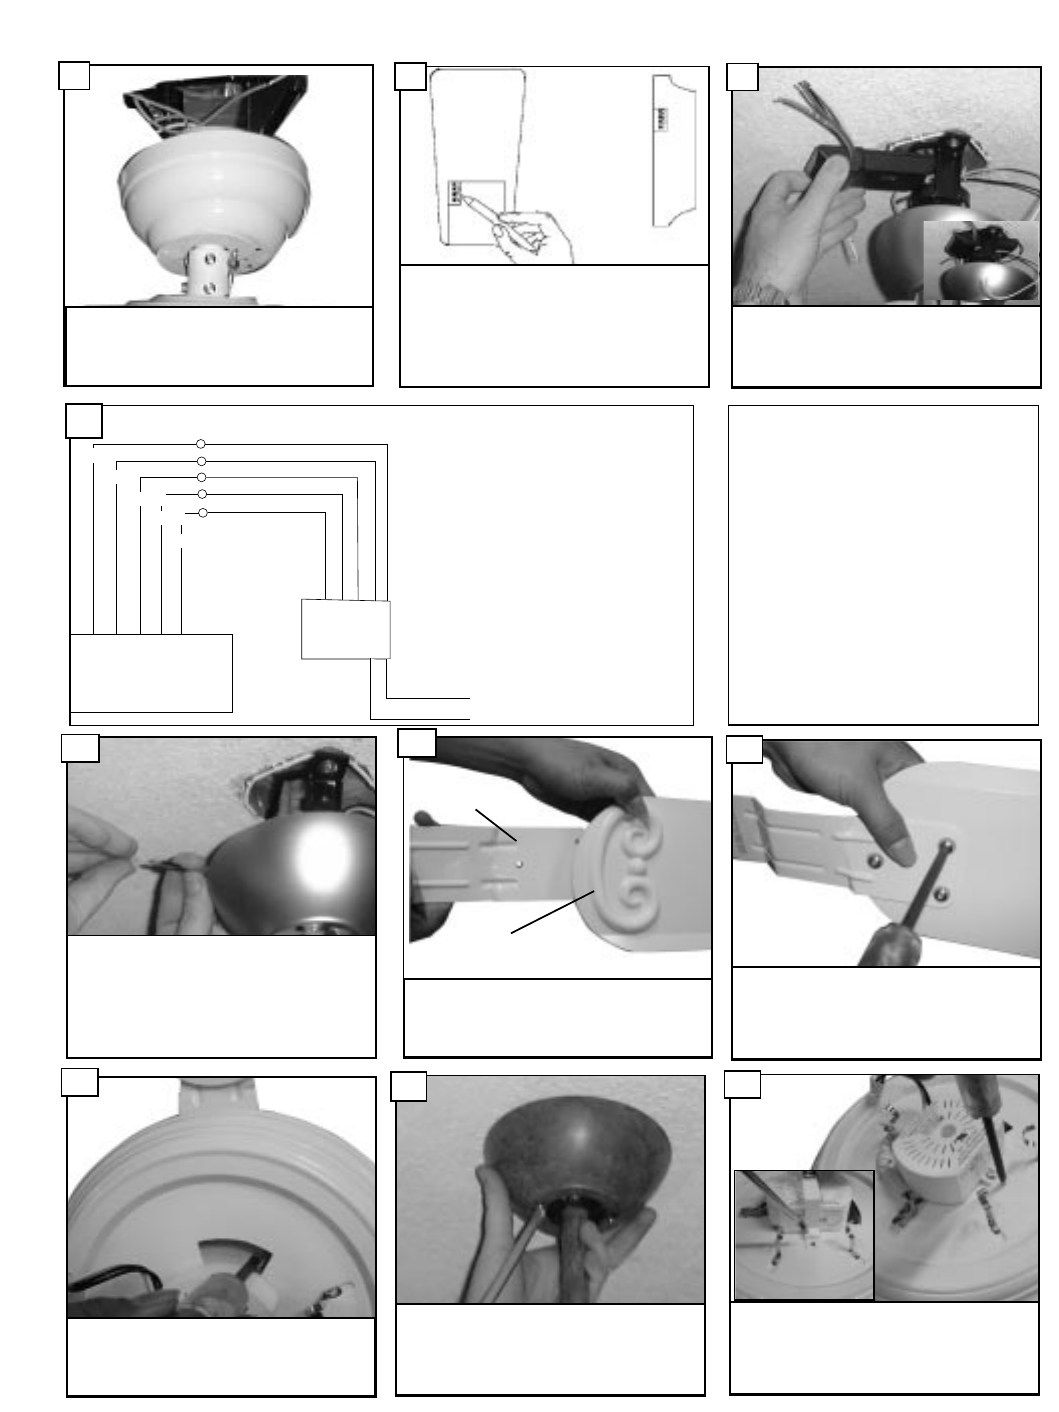
Before installing the remote receiver. Make sure the
DIP switches in the Transmitter and receiver are set
the same. Use instrument with a sharp point to
move the switches into the proper positions. The
Remote will not operate if this procedure is not
done. If interference from outside transmitters or
other remote devices is incountered, change the dip
switch settings on both transmitter and receiver.
8


Find Your Products By Category
Please Login
