
0
Owner's of the Sea Gull Lighting Fan Sea Gull Lighting Ceiling Fan gave it a score of 0 out of 5. Here's how the scores stacked up:
Copyright 1998, Sea Gull Lighting Products, Inc.
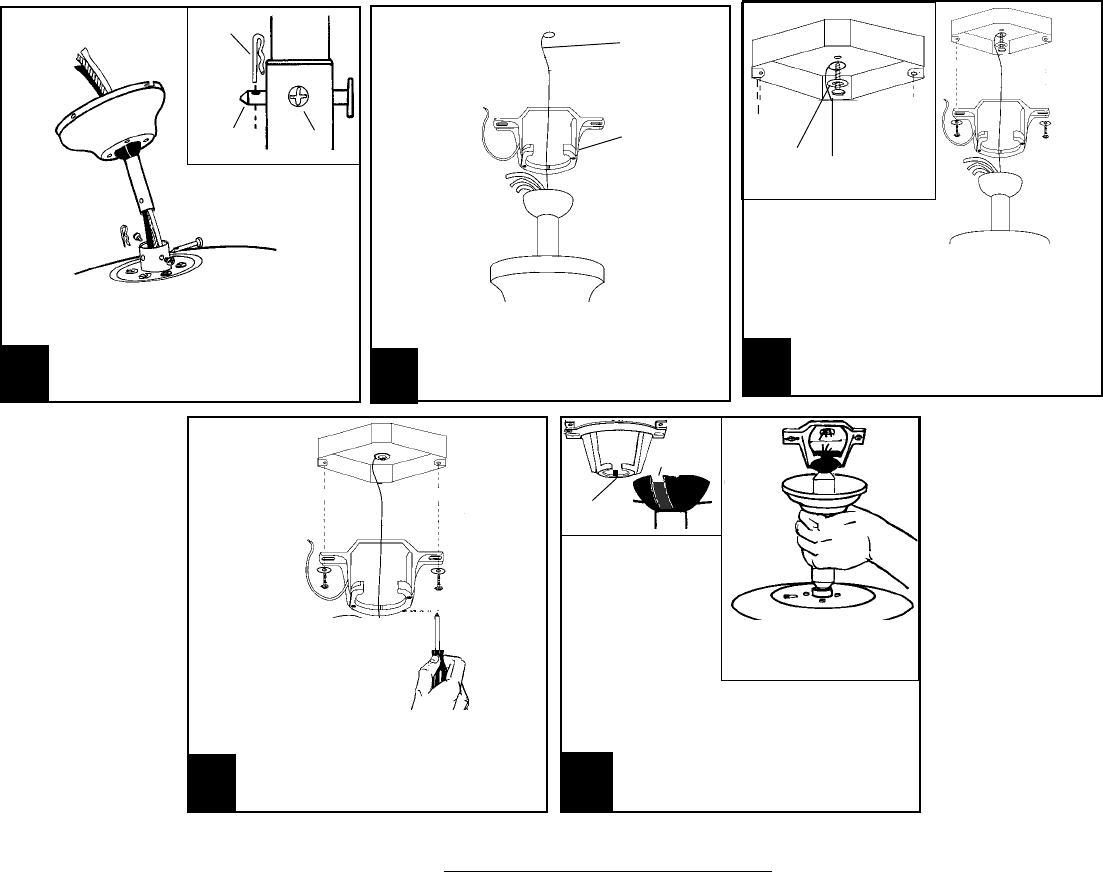
3
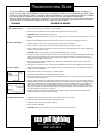
2
While the fan assembly is still on the
ground thread the safety cable through
the mounting bracket.
safety cable
mounting
bracket
Lift fan assembly and install the safety cable
directly to the building structure using the 3" lag
screw and plain washer provided. Before
proceeding to the next step make sure that the
cable is properly installed and will support
the fan weight. Make sure the screw
washer and safety cable are installed using
the order pictured above.
4
Ball
Notch
A
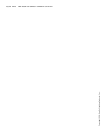
5
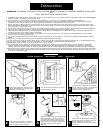
Install mounting bracket to outlet box in
ceiling using the screws provided with the
outlet box and washers.
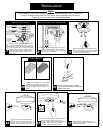
1
Feed motor lead wires through downrod/
canopy assembly and insert downrod into
motor yoke. Next, insert clevis pin through
yoke and downrod and secure with cotter
pin. (see inset) Tighten both yoke set
screws to further secure downrod.
Clevis
Pin
Set
Screws
Cotter
Pin
Ridge
plain
washer
safety cable
3" lag
screw
Set
screw
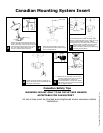
WARNING: MOUNT ONLY TO AN OUTLET BOX MARKED
ACCEPTABLE FOR FAN SUPPORT
All set screws must be checked and retightened where necessary before
installation.
Canadian Safety Tips
A. Carefully lift fan assembly onto mounting
bracket. Rotate fan so that the notch on
the ball engages the ridge in the
mounting bracket. This will allow hands-
free wiring. For wiring instructions please
refer to page 4 step #7.
Canadian Mounting System Insert


Find Your Products By Category
Please Login
