
0
Owner's of the Craftmade Outdoor Ceiling Fan MOR54ESP3, MOR54MWW3 gave it a score of 0 out of 5. Here's how the scores stacked up:
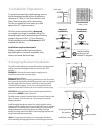

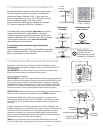
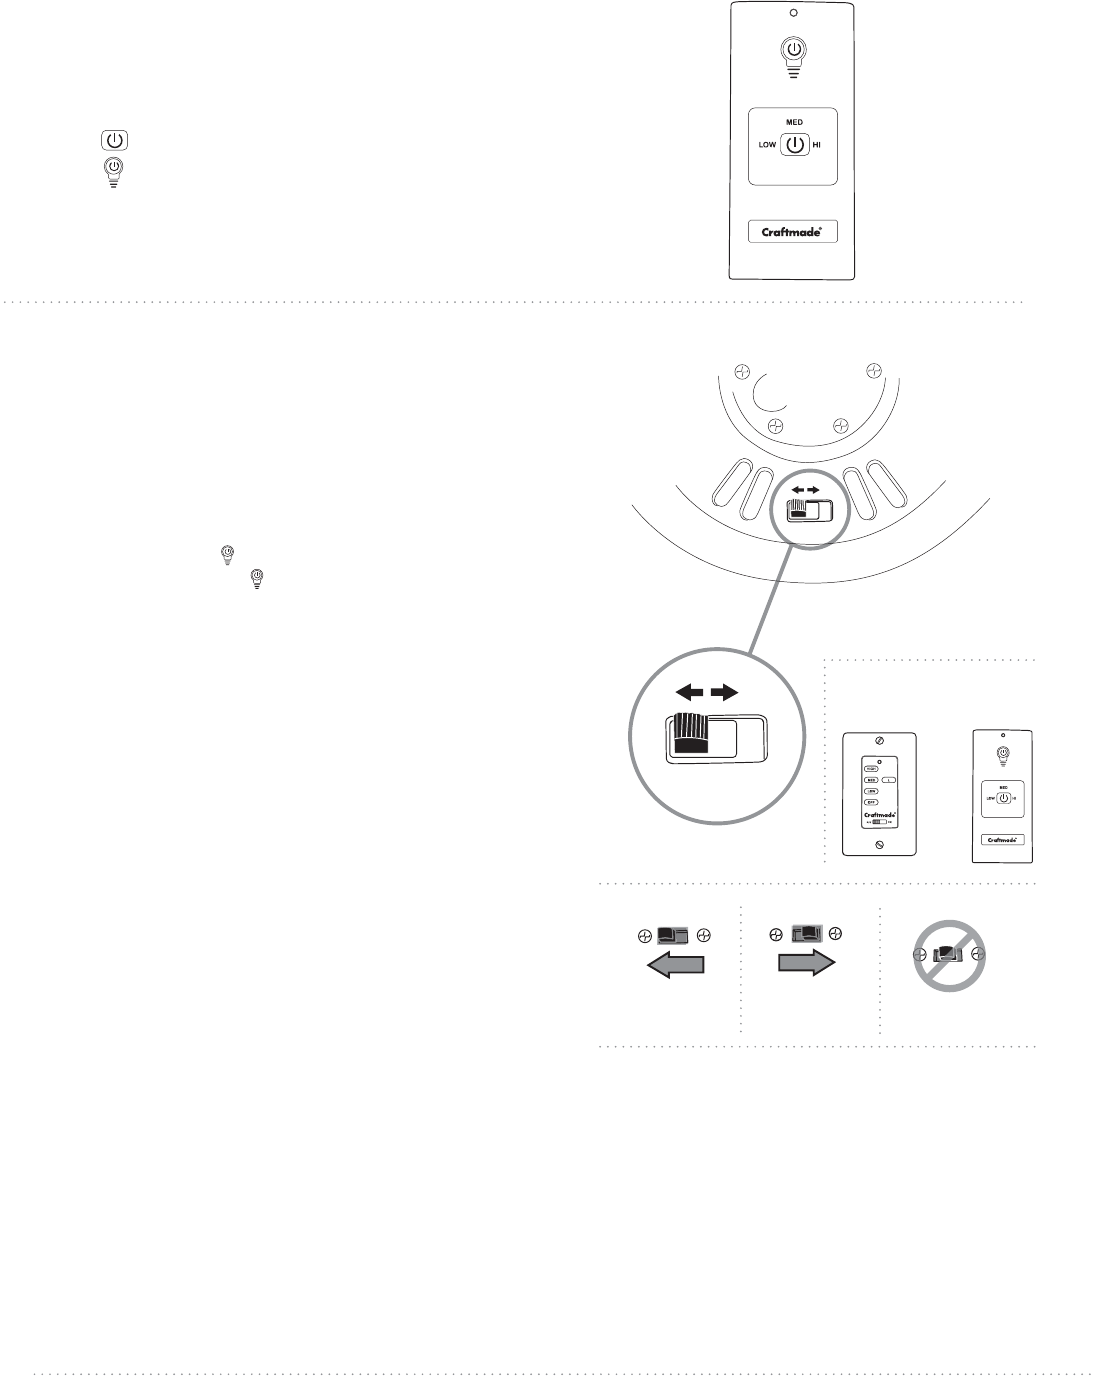
HI button - turns fan to HIGH speed
MED button - turns fan to MEDIUM speed
LOW button - turns fan to LOW speed
button - turns fan OFF
button - turns light ON/OFF when pressed once;
dims light when pressed and held down.
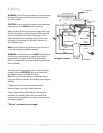
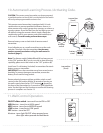
12. Remote Control Operation.
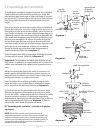
reverse switch
diagram 1
motor
housing
(topside)
remote control
transmitter
wall
control
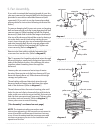
It is recommended that you test fan before
finalizing installation. Locate ON/OFF slider
switch on wall control and set to the ON
position. Test light and dimmer function and
then test fan speeds. Next, locate remote control
transmitter. Test the light ON/OFF function by
pressing the button. Test the dimmer function
by pressing the button and holding it down for
more than 2 seconds. Test fan speeds with the
different fan speed buttons. If the wall and
remote control operate all of the functions of the
fan and light, battery has been installed correctly
in each. If the wall and/or remote control do
(does) not operate all of the fan functions, refer
to "Troubleshooting" section to solve any issues
before contacting Customer Service.
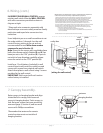
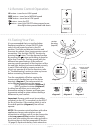
Turn fan completely off before moving the
reverse switch (located on top of the motor
housing). (diagram 1) Set reverse switch to
recirculate air depending on the season:
- LEFT position in summer (diagram 2)
- RIGHT position in winter (diagram 3)
A ceiling fan will allow you to raise your
thermostat setting in summer and lower your
thermostat setting in winter without feeling a
difference in your comfort.
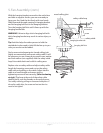
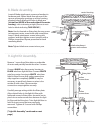
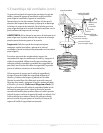
Important: Reverse switch must be set either
completely to the LEFT or completely to the RIGHT
for fan to function. If the reverse switch is set in
the middle position (diagram 4), fan will not
operate.
NOTE: If the remote control interferes with other
appliances, change code switches on the
transmitter to another code. If you do change the
code, turn power off first, remove the battery
cover, and, after setting the new code, go back to
the instructions in the last paragraph of Section
10 (page 8). Replace the battery cover when done.
13. Testing Your Fan.
diagram 2 diagram 3 diagram 4
page 11


Find Your Products By Category
Please Login
