
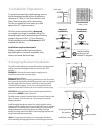
0
Owner's of the Craftmade Outdoor Ceiling Fan MOR54ESP3, MOR54MWW3 gave it a score of 0 out of 5. Here's how the scores stacked up:

page 8
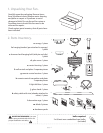
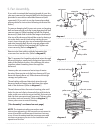
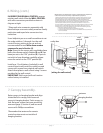
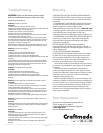
Locate 9 blade attachment screws and washers in
hardware pack. Slide a blade through one of the
narrow, rectangular openings on motor housing,
aligning holes in blade with holes in blade arm
(located on INSIDE of the underside of the motor
housing)--refer to drawing at right. [Be sure to note
label on blade indicating THIS SIDE UP.]
Note: Use slot located on fitter plate for easy access
to innermost motor screw holes with screwdriver.
Insert 3 blade attachment screws (along with
washers) and then tighten screws securely with a
Phillips screwdriver. Repeat procedure for each
remaining blade.
Note: Tighten blade arm screws twice a year.
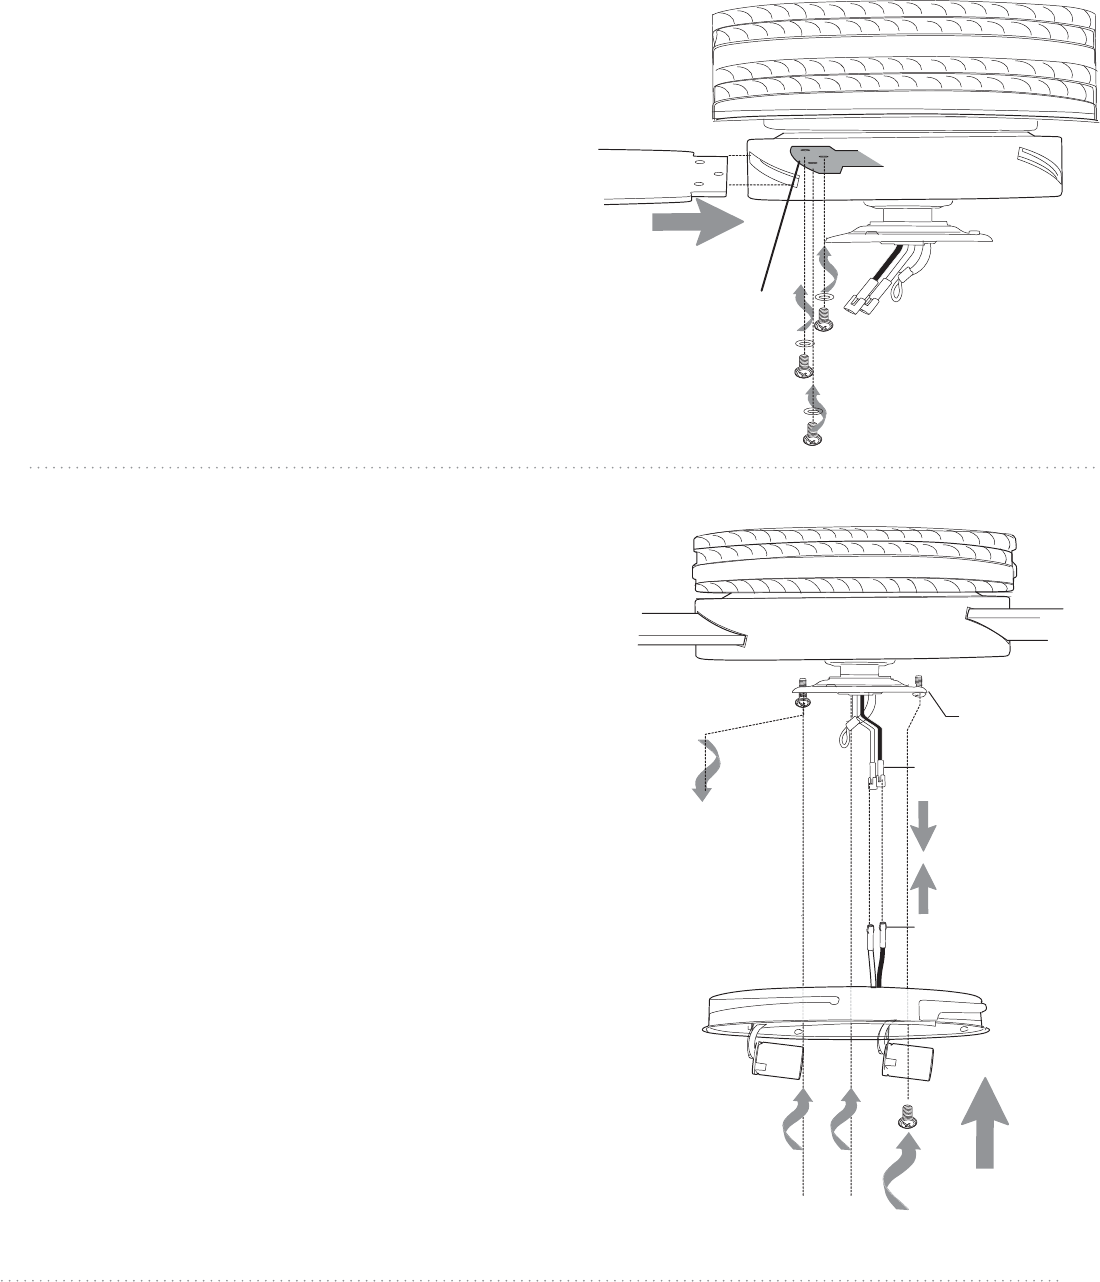
8. Blade Assembly.
9. Light Kit Assembly.
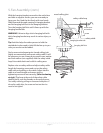
Remove 1 screw from fitter plate on underside
of motor and partially loosen the other 2 screws.
Connect BLACK wire from motor housing to
BLACK wire from light kit fitter. Connect WHITE
wire from motor housing to WHITE wire from
light kit fitter. Be sure that molex connections
snap together completely. [NOTE: It may be
necessary to push back sleeve on wires to be
certain of wire colors.] Be sure molex
connections snap together securely.
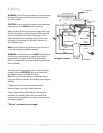
Carefully arrange wiring within the fitter plate.
Align slotted holes in the light kit fitter with
loosened screws in fitter plate--be careful not to
pinch wire or molex connections between the light
kit fitter and the fitter plate. Twist light kit fitter to
lock. Re-insert screw that was previously
removed. Tighten all 3 screws with Phillips
screwdriver.
["Light Kit Assembly" continued on next
page.]
motor housing
blade
blade attachment
screws and washers
fitter plate
molex
connections
light kit fitter
molex
connections
blade
arm
fitter
plate


Find Your Products By Category
Please Login
