

0
Owner's of the Fanimation Fan Fanimation FP8042WH Cancun 42 Inch Ceiling Fan In Oil Rubbed Bronze gave it a score of 0 out of 5. Here's how the scores stacked up:


10
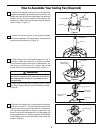
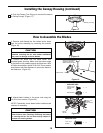
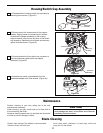
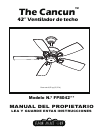
Installing the Canopy Housing (continued)
4. Push the Canopy Trim Ring up to conceal the screws
of Ceiling Canopy. (Figure 17)
Figure 17
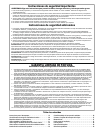
How to Assemble the Blades
1. Remove and discard the five rubber motor stops
from the motor assembly by removing the screws.
(Figure 18)
CAUTION
Do not connect fan blades until the fan is completely
installed. Installing the fan with blades assembled
may result in damage to the fan blades.
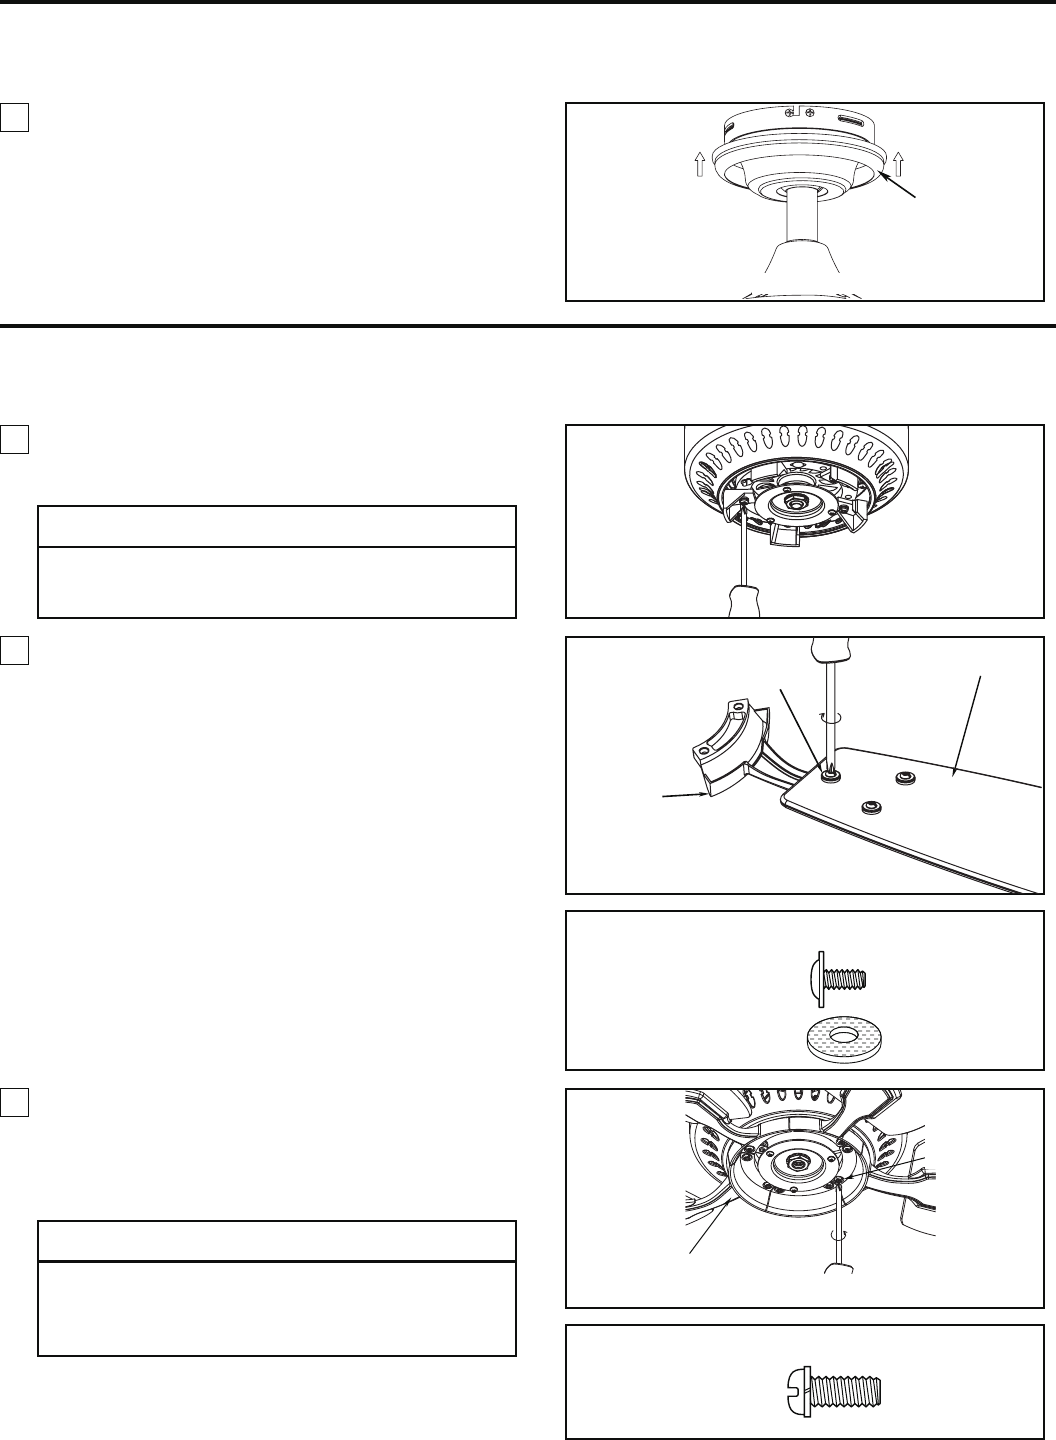
2. Position the blade over the blade holder with
threaded posts showing. Make sure the bottom edge
of the blade is fully seated against the blade arm. With
a Phillips screwdriver, tighten 3/16-24x7.5 mm washer
head screws with fiber washers to secure the blade to
the blade arm. (Figure 19)
HARDWARE USED:
3/16-24 x 7.5 mm
WASHER-HEAD
SCREWS
X 15
FIBER WASHER X 15
3. Attach blade holders to the motor hub using the
1/4-20x14 mm screws. (Figure 20)
NOTE: Periodically check blade holder hardware and
resecure if necessary.
HARDWARE USED:
1/4-20 x 14 mm
SCREWS
X 10
CAUTION
To reduce the risk of personal injury, do not bend the
blade holders when installing, balancing the blades
or cleaning the fan. Do not insert foreign objects in
between the rotating blades.
Canopy Trim Ring
Figure 18
BLADE
HOLDER
Figure 20
1/4-20 x 14 mm
SCREWS
(2 per assembly)
3/16-24 x 7.5mm Washer-
Head Screw and Fiber
Washer (3 each per blade)
Blade
Blade Holder
Figure 19


Find Your Products By Category
Please Login
